Getting Started
The Straddle Dashboard is where you manage all of your payment activity. Here's how to log in and start exploring.
Logging In
Open your browser and go to dashboard.straddle.com. You can sign in with your email and password, or use one of the single sign-on options: Google, GitHub, LinkedIn, or Microsoft.
Dashboard Overview
Learn how the dashboard is organized so you can quickly find what you need.
Main Navigation
The main navigation menu sits on the left side of the screen and stays visible no matter where you are in the dashboard. Use it to jump between sections at any time.
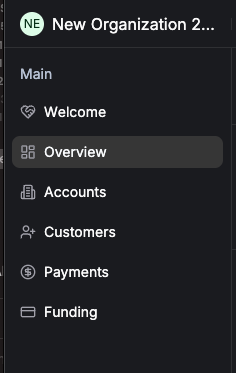
Here's what each item in the navigation does:
| Menu Item | What It Does |
|---|---|
| Welcome | Returns you to the main Welcome page with setup links and getting-started resources. |
| Overview | Shows key metrics at a glance: recent accounts, customers, deposits, withdrawals, and any items that need your attention. |
| Payments | View all payment transactions — search, filter, and drill into individual payment details. |
| Customers | Browse and manage your customers, view their contact info, and see payment history. |
| Funding | Track settlement batches — see when money is deposited to or withdrawn from your bank account. |
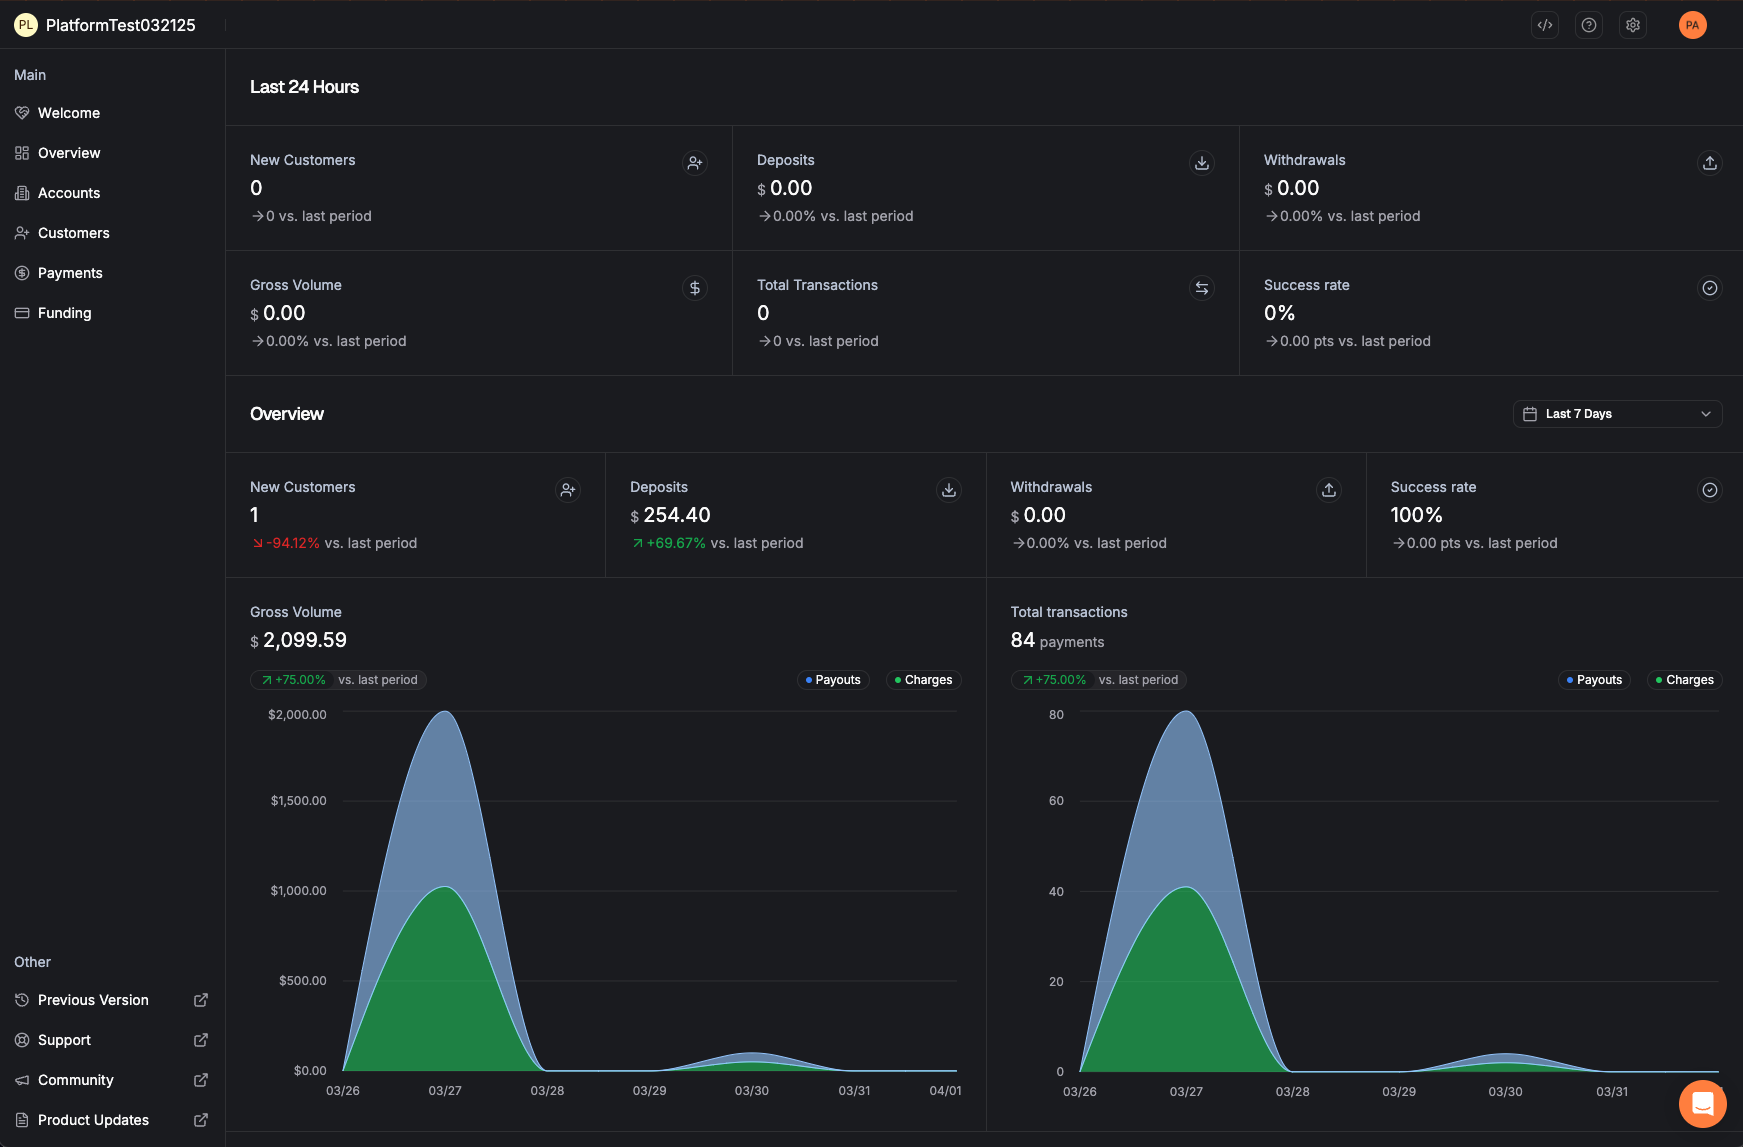
Overview Page at a Glance
When you click Overview, you'll see a snapshot of your recent activity. This is your daily starting point to check if everything is running smoothly.
| Metric | What It Tells You |
|---|---|
| New Customers | Recent customer registrations. |
| Deposits | Total money paid out to your bank account (from collected payments). |
| Withdrawals | Money pulled from your account (refunds, returned payments). |
| Gross Volume | The total dollar amount of all transactions processed. |
| Total Transactions | The total number of payments processed. |
| Success Rate | The percentage of payments that completed successfully without returns or failures. |
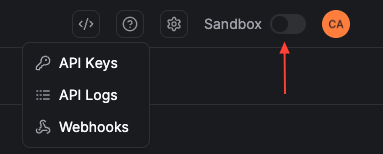
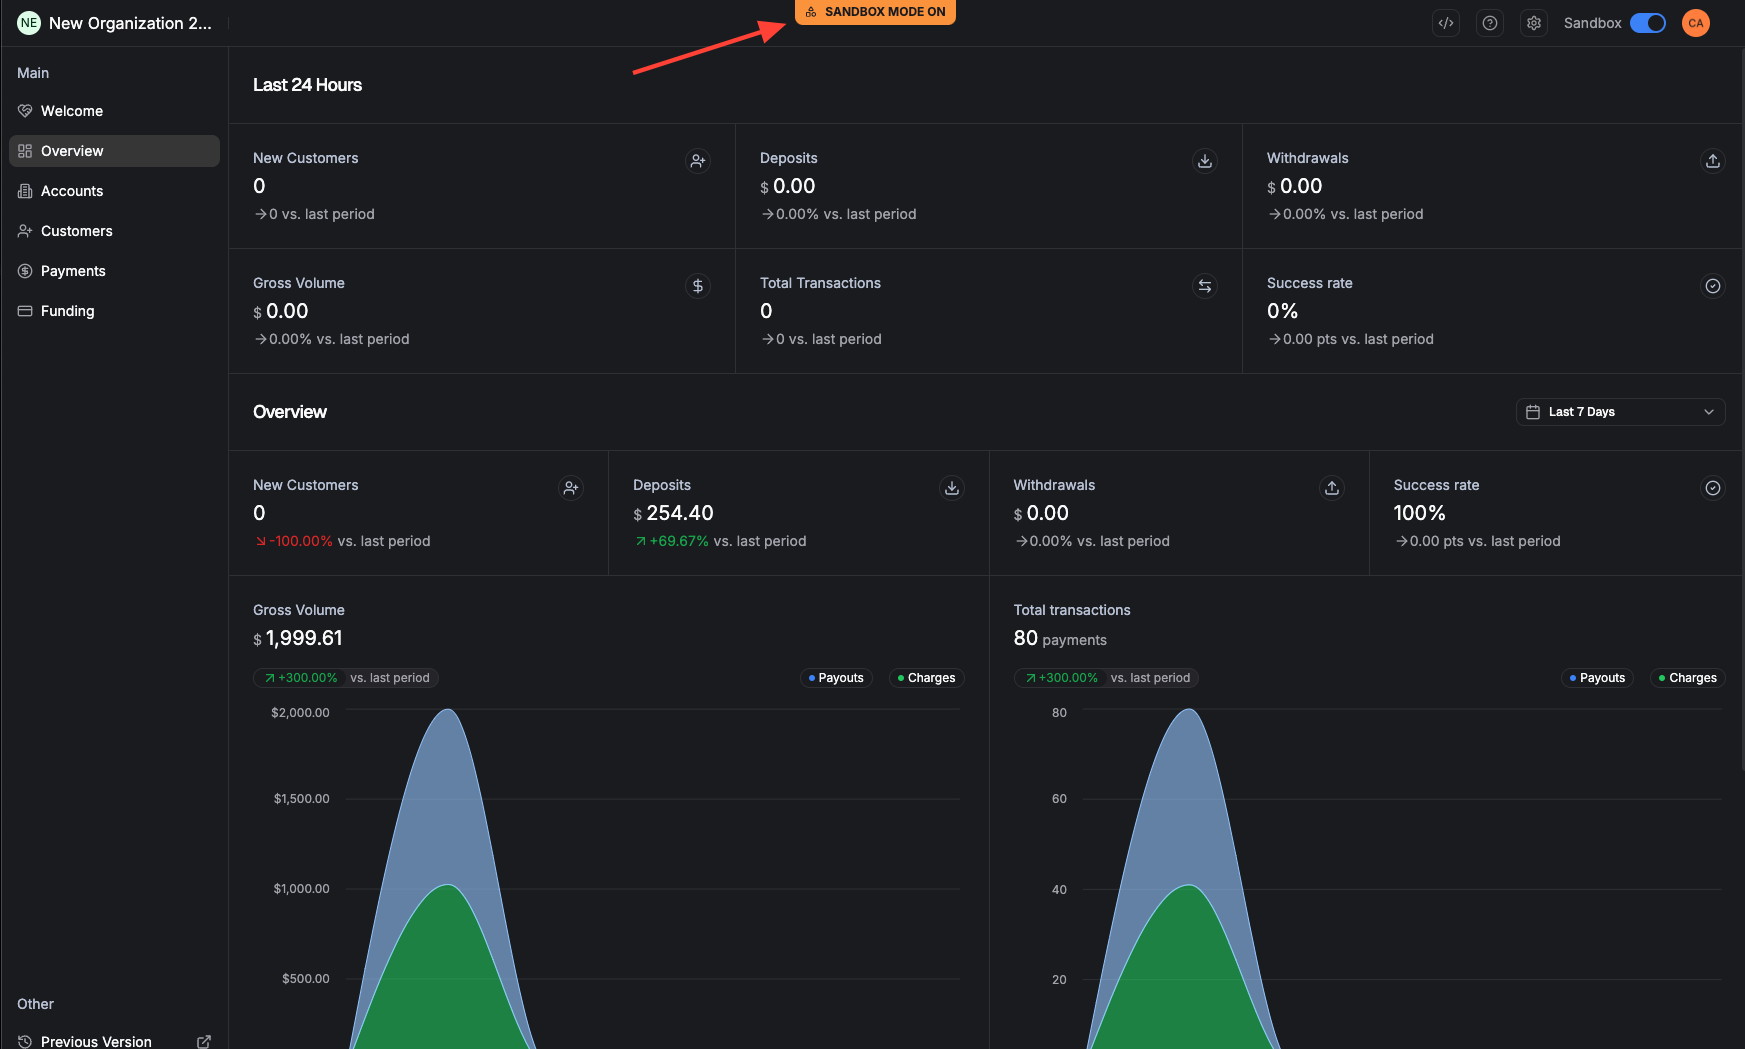
Sandbox vs. Production
The dashboard has two separate environments: Sandbox (for testing) and Production (for real transactions). You can switch between them using the toggle in the top-right area of the screen.
Working with Payments
The Payments section is where you track every transaction — from the moment a charge is created through settlement and beyond.
Viewing Your Payments
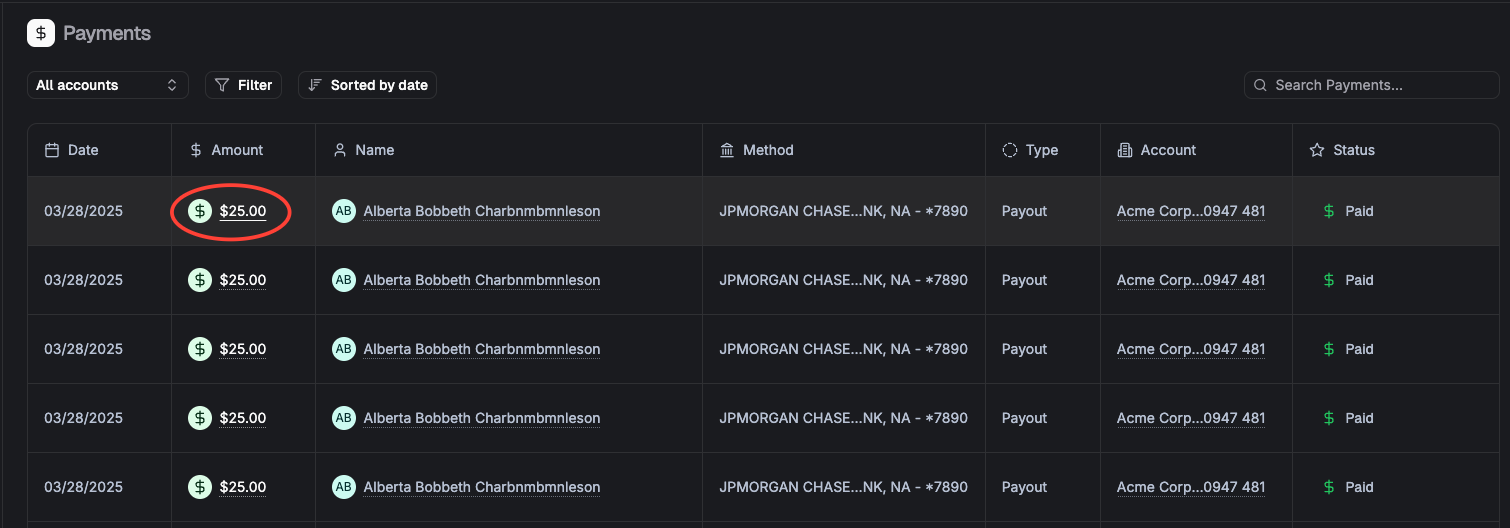
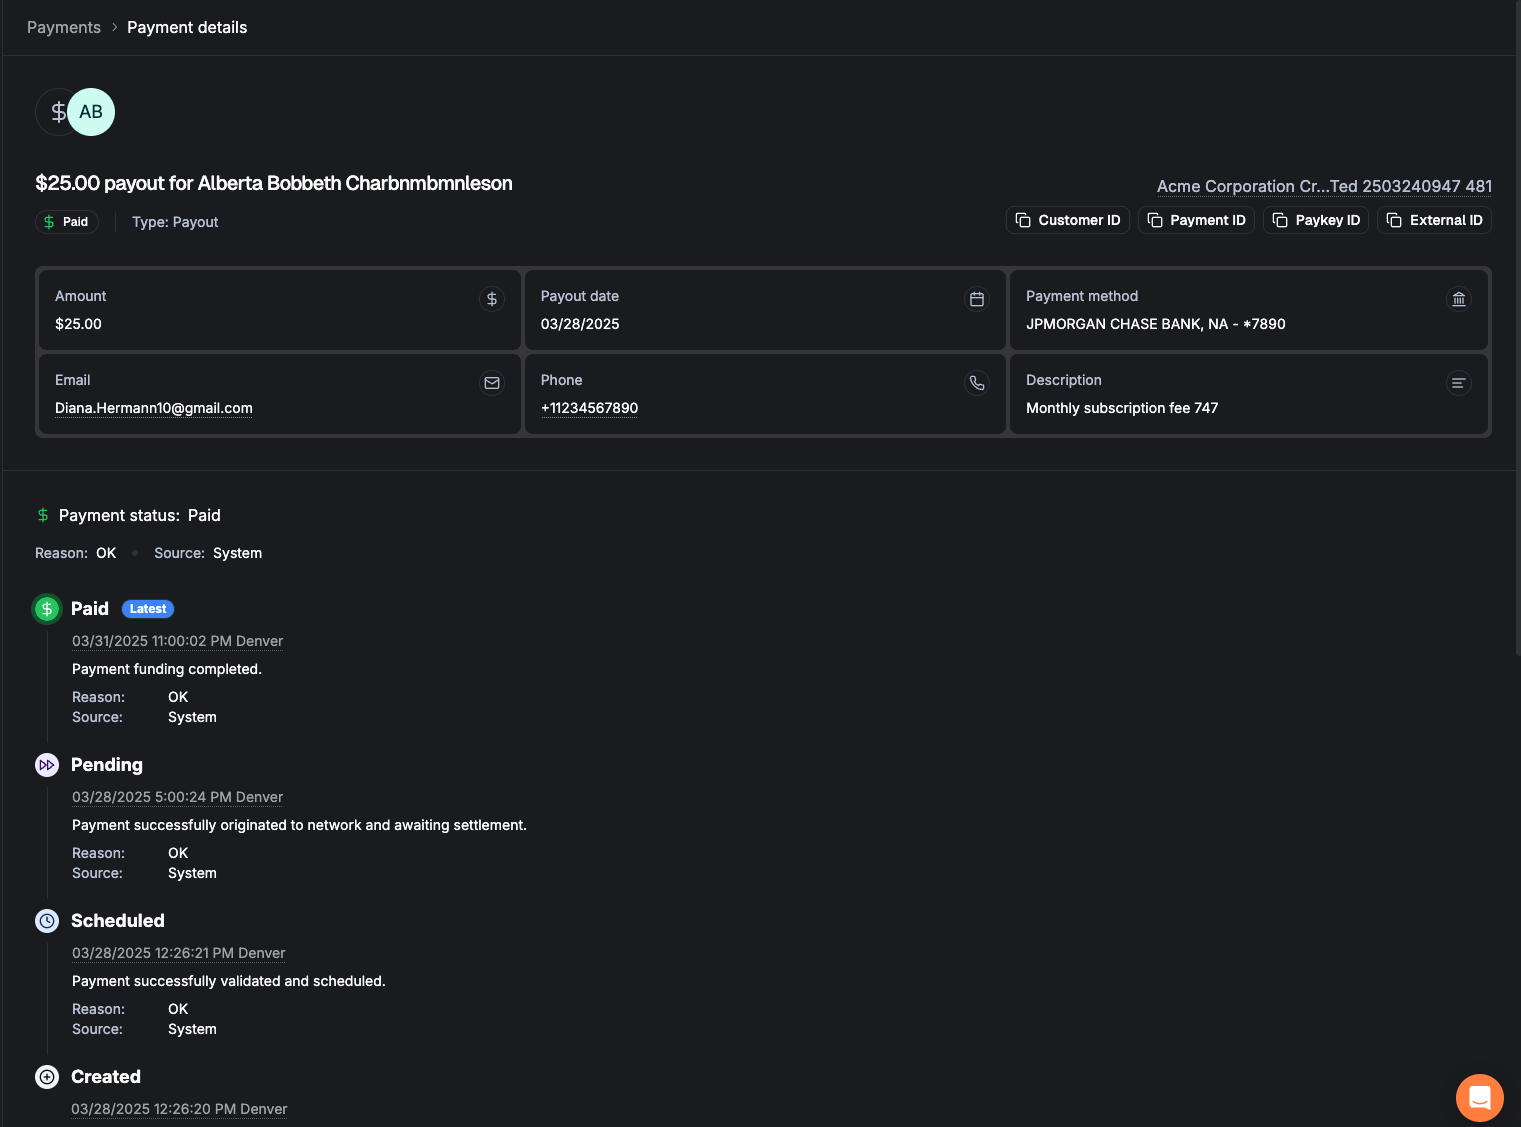
Payment Detail Page
The detail page gives you everything about a single payment in one place:
| Section | What You'll Find |
|---|---|
| Payment Details | The amount, effective date, and which bank account the payment is linked to. |
| Customer Information | The name and key details of the customer who made (or received) the payment. |
| Additional Information | Any extra data attached to the payment, such as invoice numbers or reference IDs. |
| Payment Timeline | A step-by-step breakdown showing exactly when each stage happened — think of it as a tracking number for your payment. |
Understanding Payment Statuses
Every payment moves through a series of statuses. Here's what each one means in plain language:
| Status | What It Means |
|---|---|
| Created | The payment request has been received and recorded. |
| Scheduled | The payment is queued up and waiting to be sent to the banking network. |
| Pending | The payment has been submitted to the bank. It's now in the banking system being processed. |
| Paid | The money has settled. The payment is complete. |
| Failed | The payment was returned by the bank before the money was settled to you. No money changed hands. |
| Reversed | The payment was returned by the bank after you already received the funds. The money will be deducted from the next day's deposit. If no money is in flight, your linked bank account will be debited. In either scenario, the reversal will be detailed in a funding event summary. |
| Cancelled | The payment was voided before it reached Pending status. No money was moved. |
Managing Customers
The Customers section lets you view and manage the people or businesses who pay you. Find contact details, check verification status, and review payment history — all in one place.
Finding a Customer

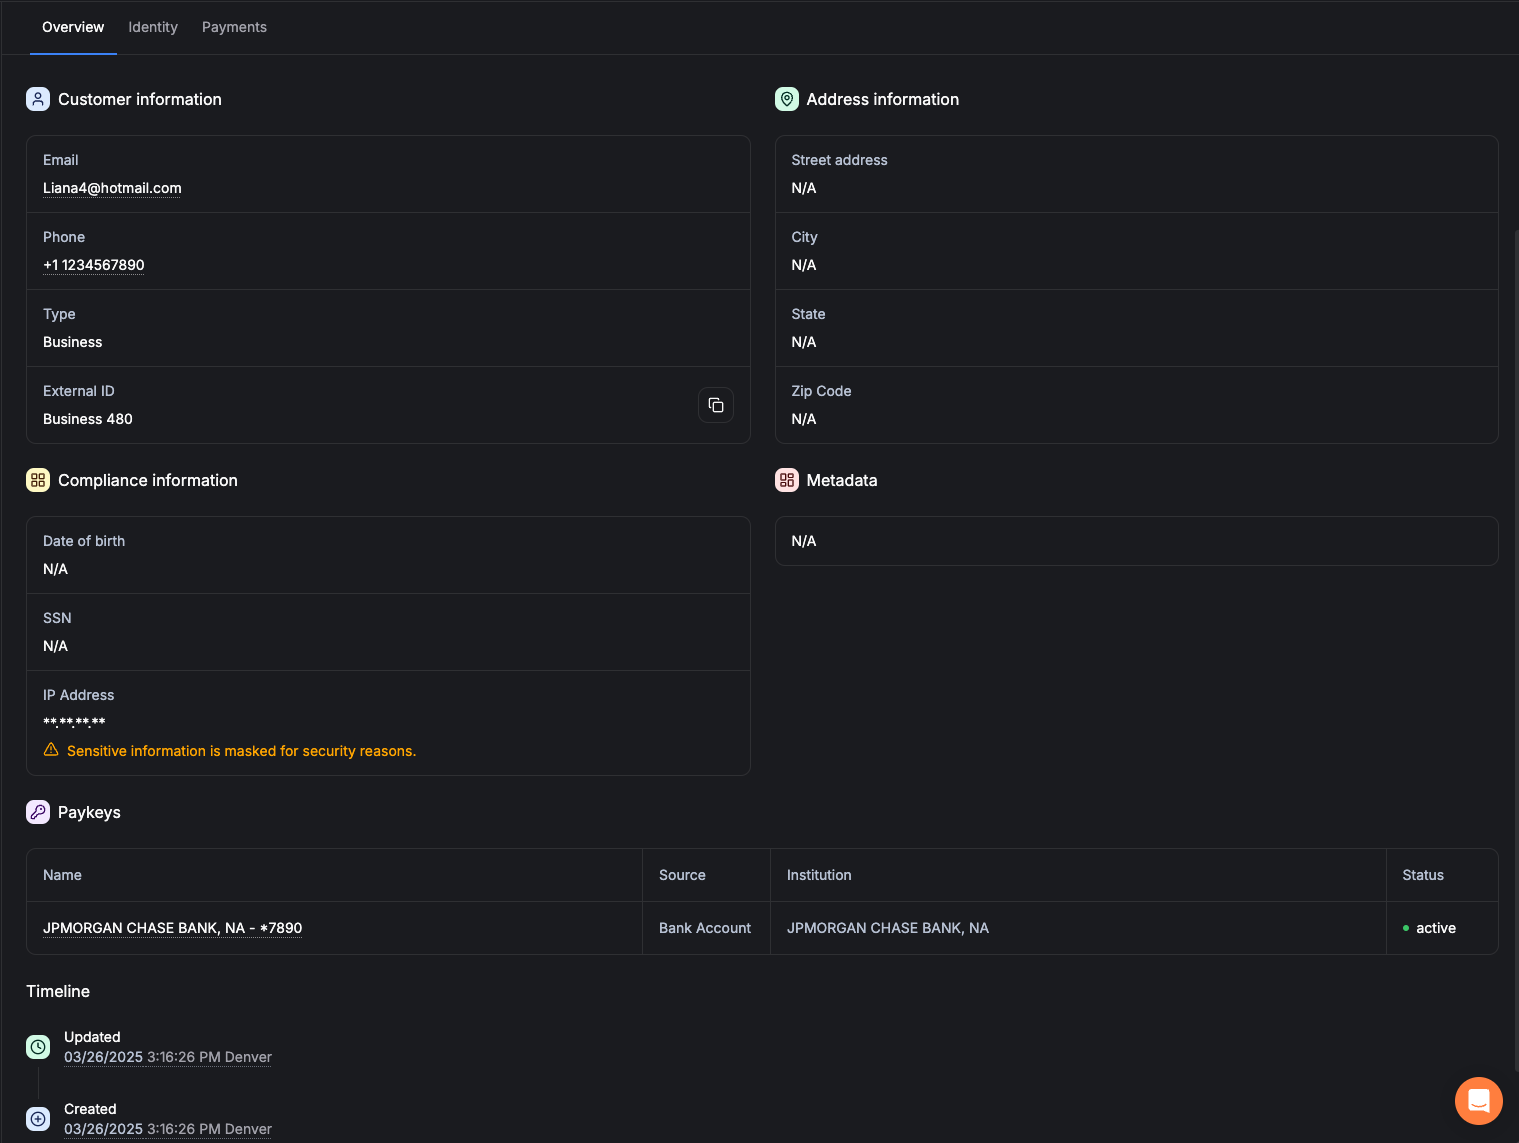
Customer Detail Page
The Customer Detail page is organized into three tabs, each showing different information:
Overview Tab
Your one-stop view of the customer. Includes contact information (email, phone), compliance/verification status, any additional data, and a list of the customer's Pay Keys (their stored payment methods).
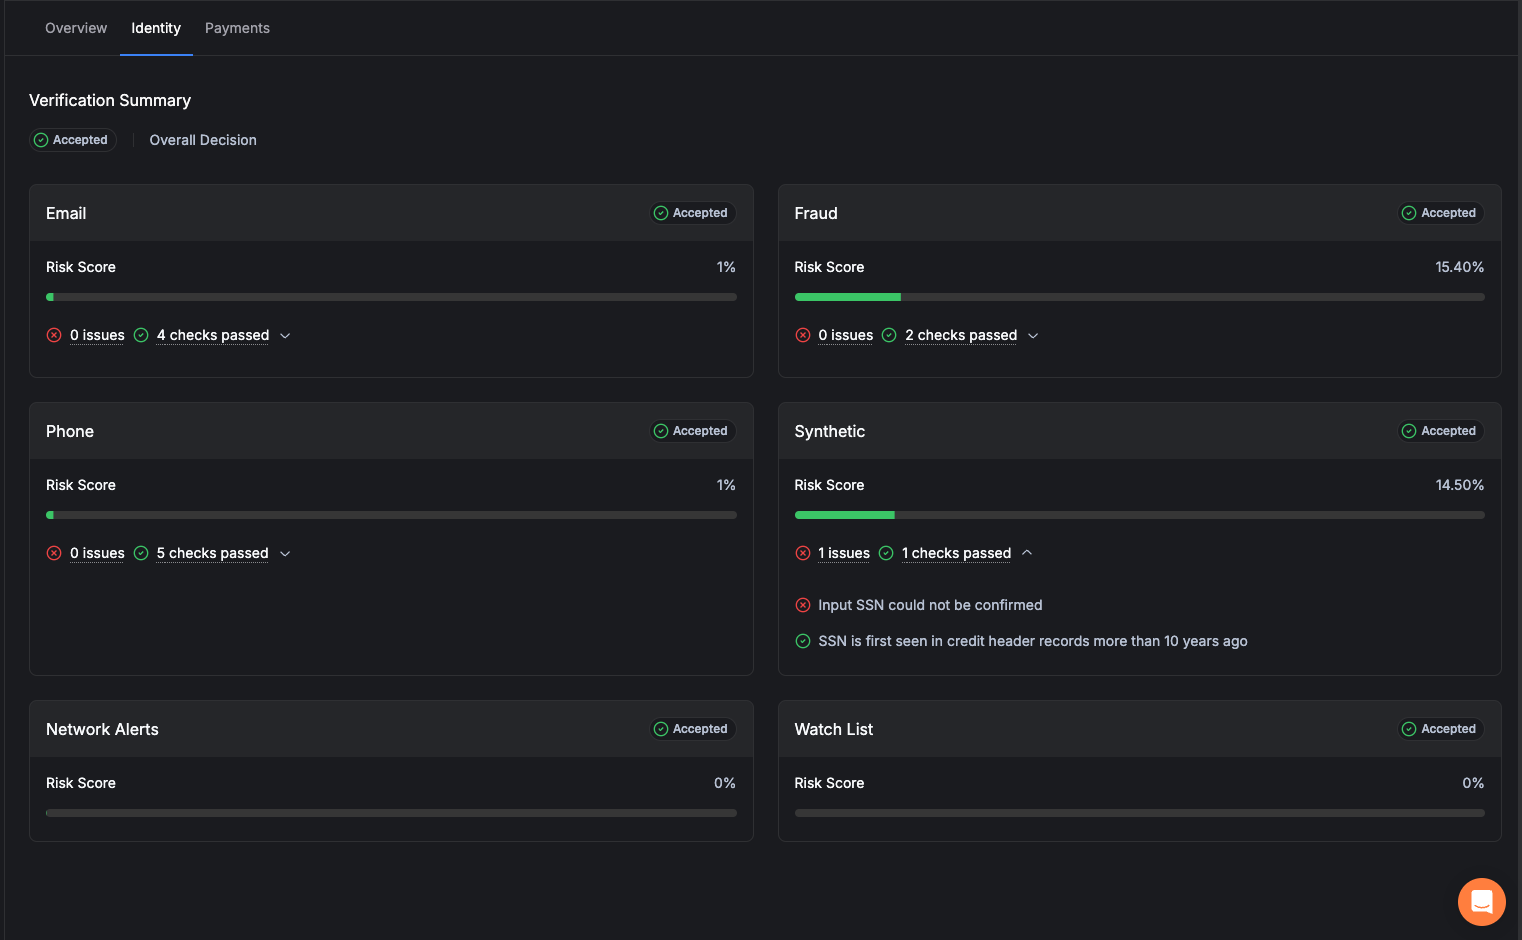
Identity Tab
Shows the results of identity verification checks in a simple, visual format. Green checkmarks mean checks passed. If anything needs attention, you'll see clear indicators. Click the arrow next to any section to expand the full details.
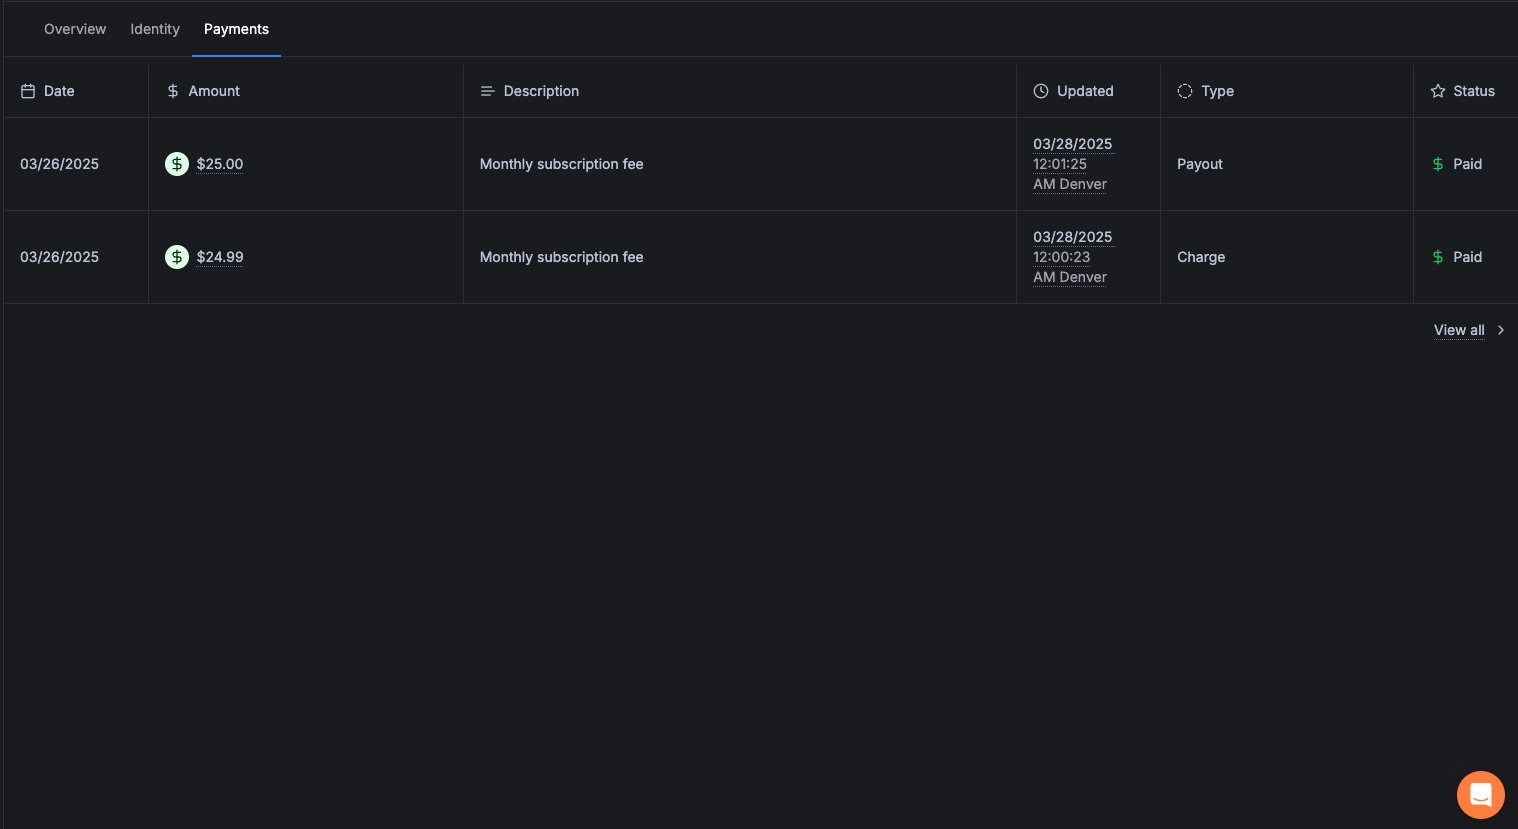
Payments Tab
Lists every payment associated with this specific customer. You can see amounts, dates, and statuses at a glance. Click any payment amount to jump directly to its Payment Detail page.
Funding & Settlements
Funding events show you when money actually moves to and from your bank account. Each "event" is a batch of payments that settles together.
Viewing Funding Events

Types of Funding Events
| Type | What It Means |
|---|---|
| Deposit | Money sent to your bank account from customer payments you've collected. |
| Withdrawal | Money pulled from your bank account (e.g., for refunds or reversed payments). |
| Charge Reversal | A deduction for a payment that was returned after you were already paid. |
| Payout Return | An outbound payment that failed and the money came back. |
Reconciling with Your Bank Statement
Every funding event has a unique Funding ID that appears on your bank statement. This means you can match every deposit or withdrawal in your bank to a specific batch of payments in Straddle — no more mystery deposits.
When Does Money Settle?
Collected payments (charges) are batched daily, typically around 8:00 PM Eastern time. The batch is then sent to your bank overnight.
Outbound payments (payouts) are processed multiple times throughout the day and sent at the next available window.
Payment Returns & R29 Handling
Sometimes a bank returns a payment. Here's what that means and what to do about it — especially for the most common return type, R29.
What Is an R29?
An R29 return means "Corporate Customer Advises Not Authorized." This is the most common return in business-to-business payments. It happens when a customer's bank requires them to pre-approve companies that can collect payments from their account (known as "positive pay").
The fix is simple: The customer needs to add Straddle's Company ID to their bank's approved list. Once they do, future payments will process without issue.
What Happens When a Payment Is Returned
Unblocking a Pay Key (R29)
For R29 returns, you can unblock the Pay Key yourself directly from the dashboard:
Return Codes Quick Reference
| Code | Meaning | Can I Unblock It? |
|---|---|---|
| R29 | Corporate Not Authorized — customer's bank requires pre-approval | Yes (once) |
| R10 | Consumer Unauthorized — customer disputes the payment | No — contact support |
| R02/R03/R04 | Account Closed / No Account — bank account no longer valid | No — account issue |
| R16 | Account Frozen — account has been restricted by the bank | No — contact support |
Account & Settings
Manage your company profile, team members, and personal account settings.
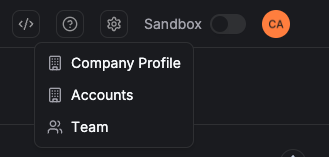
Settings Menu
Click the gear icon in the top-right area of the dashboard to access account-level settings:
| Option | What It Does |
|---|---|
| Company Profile | View your company's contact details and business settings. |
| Team | Add, remove, and manage team members. Assign roles and permissions. |
Your Personal Settings
Click your profile picture or initials in the top-right corner to access personal settings:
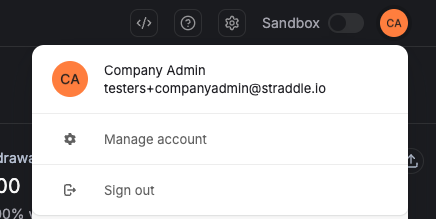
From here you can:
- Update your personal details and preferences
- Change your password
- Set up two-factor authentication (2FA) for extra security
- Sign out of your account
Managing Your Team
If you have an Admin role, you can invite new team members to the dashboard:
User Roles Explained
| Role | What They Can Do |
|---|---|
| Admin | Full access — manage users, view settings, change bank accounts, invite team members, and everything else. |
| Developer | Access to technical features like API logs and webhooks. Cannot manage users or company profile. |
| Member | Day-to-day access — view business info, manage payments, unblock Pay Keys. Cannot invite users. |
Bank Account Management
If you need to add or change a bank account (for receiving deposits, making payouts, or paying fees), you can do it directly in the dashboard:
Getting Help
Have a question or need assistance? Here's how to reach the right people.
Contact Straddle Support
When to Contact Straddle vs. Others
| I Need Help With… | Contact |
|---|---|
| Payment status or reconciliation | Straddle Support |
| Bank account issues | Straddle Support |
| R29 / unblocking Pay Keys | Straddle Support (or self-service in dashboard) |
| ConnectBooster integration | Your Kaseya / ConnectBooster team |
Helpful Links
| Resource | Where to Find It |
|---|---|
| Dashboard | dashboard.straddle.com |
| Help Center | help.straddle.com |
| API Documentation | docs.straddle.com |
Common Tasks at a Glance
| I Want To… | Here's How |
|---|---|
| Find a payment | Go to Payments → Use filters (amount, ID, customer, date range) |
| Check payment status | Click the payment → View the timeline at the bottom of the page |
| Get a trace number | Open a payment → Look in the "Trace Numbers" section |
| Unblock an R29 | Go to Overview (blocked accounts) or the Pay Key → Click Unblock |
| Add a bank account | Go to your Account → Bank Accounts → Add |
| Invite a team member | Settings (gear icon) → Team → Invite User |
| View a settlement | Go to Funding → Click the funding event amount |
| Copy a resource ID | Click the copy icon next to any ID field on a detail page |
| Switch to Sandbox | Use the toggle in the top-right area of the dashboard |